|
|
Post by avengers63 on May 13, 2010 9:34:07 GMT -6
A little while ago, i asked if anyone would be interested in a detailed tutorial on making a guitar from scratch. Y'all gave me an emphatic 'yes', so here we are.
All I ask is that for this thread, you hold all comments resembling "looking good" and "I can't wait to see it finished" and the like. This is not intended to be a normal "showing off' build thread, but a step-by-step tutorial.
PLEASE ask any questions you might (and will) have about the process. I'm likely to either gloss over something or skip it entirely. I don't want to do y'all the dis-service of missing something.
Cool?
|
|
|
|
Post by avengers63 on May 13, 2010 9:58:27 GMT -6
So before you actually build anything, you need to have a plan of action. Let's assume that you decided on the body shape already. In this case, it's to me my own shape: the JM Classic. 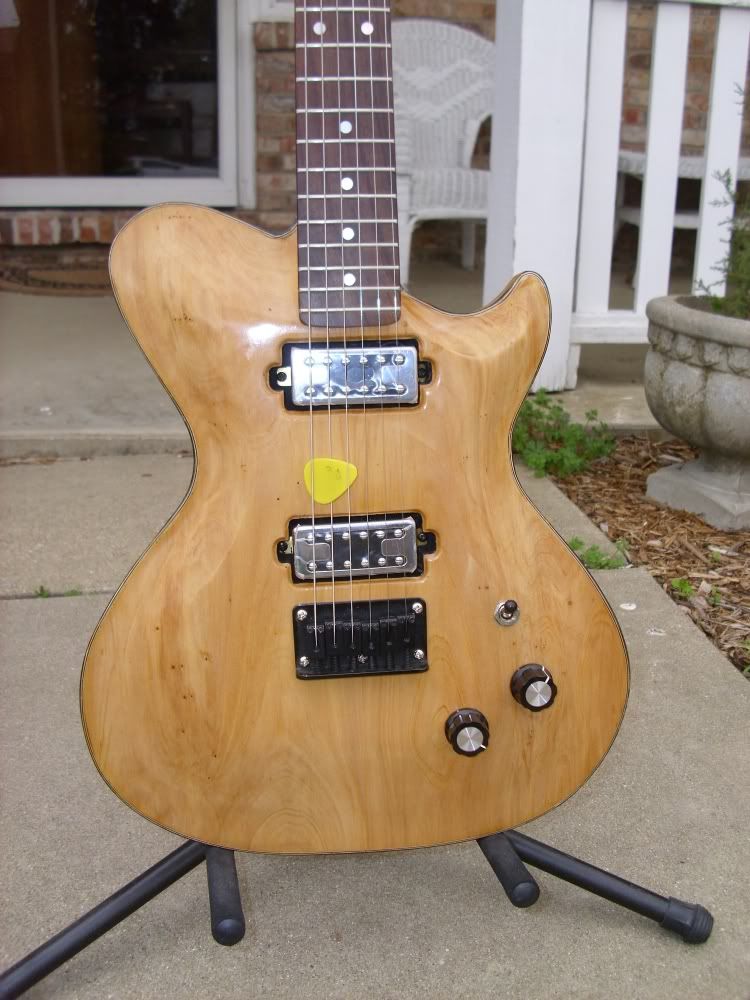 The second is to decide an overall theme or design elements. It's important to remember that the look of the finished product is just as important as the construction. You're not just throwing something together and hoping it works. You're creating art, even if you don't realize it. Granted, it's functional, but it's art nonetheless. For this guitar, I decided on doing my take on the Thinline Telecaster. 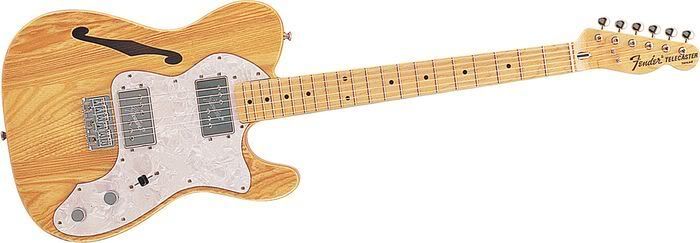 The changes I'm making to the original design are pretty significant, but the inspiration will be impossible to miss. I have a second theme on this one as well: 60's Japanese guitar funkiness. I just love those quirky old Teisco guitars. This one will incorporate not only some of that feel, but some vintage hardware as well. After you have those two things nailed down, it gets fun. What woods will you be using? What hardware? Paint, dye, finish, inlays, binding, headstock shape...... There are dozens of variables that should be figured out ahead of time. Basically, if there's an aspect of the instrument, you should give it some thought. You should also be willing to have your plans change. Something might happen in the build process that will alter your plans. Maybe just a little, maybe a lot, but it can happen. Inspiration can come from anywhere, and at any time, so keep yourself open to it. Just don't be so open that you'll throw in something that doesn't go with what you have as your overall plan/theme. You might need to put that one in your back pocket and save it for later. |
|
|
|
Post by avengers63 on May 13, 2010 10:22:24 GMT -6
Choosing the wood is an EXTREMELY important decision. The tone of the wood will do more for the sound of the guitar that nearly anything else. There's been a lot of discussion on the web about wood tone, and justifiably so. Do your research. What do you want the guitar to sound like? A Gibson? Strat? Telecaster? 80's shredder? Do you like a lot of punch in the bottom end? Attack, snap, and high end? Balanced, but with a clear voice? The wood will decide most of this. All that being said, I'm not so much of a connoisseur for wood choice. I actually go more for looks and what I have available than for dialing in the tone. But that's me, and I know ahead of time what the end result will be, so I'm making an informed decision. The wood itself has many different properties to consider. Some woods are heavier than others, some are easier to work than others, some don't need a finish, some are actually a little bit dangerous to work with due to allergic reactions or splinters that go septic in an hour. EG: A bass is notoriously neck-heavy, so picking a really heavy wood like bubinga for a bass neck is bad idea. EG: Poplar is reasonably light, inexpensive, readily available, and easy to work with. It's not pretty though, so it's a poor choice if you want a natural/clear finish. For this one, I chose walnut for the body. I have it on-hand, it's a dream to work with, has a pronounced grain but no figuring, and looks great with a clear finish. For tone, it's nearly as bright as maple, but more creamy and rounded off. Factor in that this body will be chambered, which adds warmth and mellows out the tone, and it should sound pretty nice. The neck is canarywood. It's reported to act & sound just like hard maple. Visually, it's absolutely gorgeous and matches up visually with maple very well. 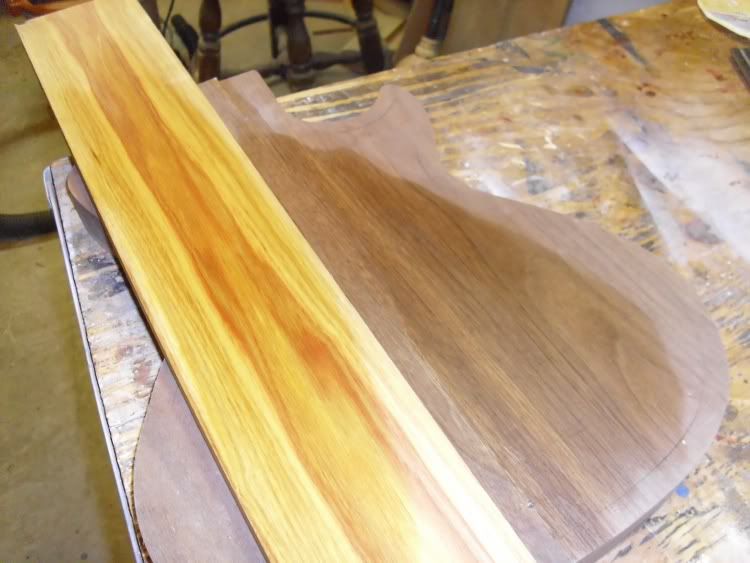 For the fretboard, I was pretty torn about what to use. I didn't want it to draw attention away from the other woods, but it still needed to look good next to them. I had chechen, bobote, cocobolo, zebrawood, and oak (to be ebonized), and maple looking at me as choices. I really couldn't make up my mind. Then God smiled on me for this. I found an ebony fretboard on eBay that already had the inlays in it. It's a factory second from Washburn. Pictures will be posted when it gets here. |
|
|
|
Post by avengers63 on May 13, 2010 10:41:21 GMT -6
There are about a thousand different ways you can go for hardware & pickups. None of them are wrong. The big two are pickups and the bridge. The implications of the pickup choices should be obvious to you, so I won't go into them here. The bridge will determine a number of things. A hardtail bridge is by far the easiest to use & plan for. This is what Fender uses on their non-trem models. They sit very low, so they don't require a neck angle. They screw directly to the body, so they don't need any extra routing. They can even have the strings attached directly to them rather than through the back of the body, so that can eliminate the need to drill holes through the body and risk mis-aligning them. They're also the overall least expensive way to go. A Tune-O-Matic or wraparound bridge requires more planning and work. These are what Gibson use. They sit higher, so they either require a neck angle or need to be recessed. The bridge needs to sit at an angle. The tailpiece needs to align with the bridge for aesthetics. Overall, they're slightly more involved than a hardtail, but no more than a beginner can handle. A vibrato unit is used in conjunction with a T-O-M bridge. These usually just bold directly onto the body and require very little for planning or installation. A Bigsby is the most common vibrato unit. A tremolo unit is by far the most involved. They require routing a rectangular hole through the body and a cavity on the back for the springs. Planning and execution of the routing are critical and easy to make mistakes on. A Floyd Rose or a Stratocaster-style ar the most common tremolo units. For this guitar, I went with vintage 4 Teisco pickups, a Rickenbacker style T-O-M bridge, and a vintage Teisco vibrato. All hardware is chrome. The tuners are vintage 3+3 style. 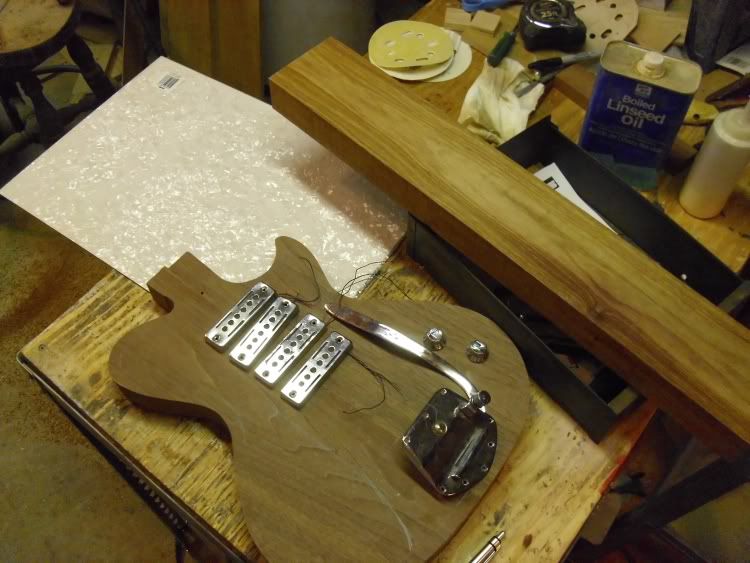 It's important to note that the most important piece of hardware to have on hand when you start the build is the bridge. Many different aspects are determined by this one piece. The second would be the nut. I'll explain their importance later. And no, I don't have the bridge on hand at the start of this build. By the time I need it, it'll be here, so there's no worries. |
|
|
|
Post by avengers63 on May 13, 2010 11:07:06 GMT -6
When choosing the wood to use on the neck, the grain needs to me examined closely. There are two types of cut you can use without laminating the neck blank: flatsawn & quartersawn. Quartersawn is ideal, but flatsawn is acceptable. Fender uses flatsawn, and has for decades, without significant issue. Flatsawn wood will have the grain basically horizontal across the board like this: ----------------- ----------------- ----------------- Quartersawn will have the grain as vertical as possible, like this: ||||||||||||||||| If the boards you want to use are neither of these, like this for example: //////////////// or this: \\\\\\\\\\\\\\\\ you will need to cut it apart and glue them together like this: ////////\\\\\\\\ You can also laminate different species together. Sometimes this is for looks, sometimes for strength. ///|/|\||\\\\ EG: Purpleheart & bloodwood are dificult to work with, but are extremely strong. They make great pinstripes and add strength and stability to other woods. This is the end of the 8/4 piece of canarywood I'll be using for this guitar. The neck blank needs to be in the 7/8"-1" range, so I need to re-saw and plane this piece. You can see that the grain is basically flatsawn. After splitting this piece down the middle, I'll take another look at it when it's cut. For my eyes, it's hard to visualize just half of the board's thickness for the grain. Also, you never know what surprises the wood may have in sotre for you once it's cut. One side may end up absolutely stunning with the other less so. Whenever you have to machine the wood, it's ALWAYS best to just wait and see. And here's why: Once the board was split, one side had some unknown tension in it that caused it to cup. 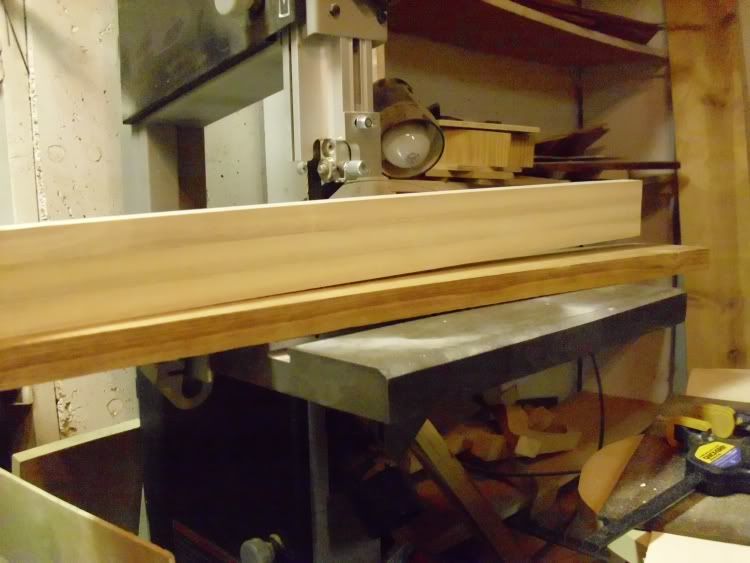 I pressed a piece of straight poplar on one end of the cupped board. See the gap on the other end? Now take a look at the other piece. 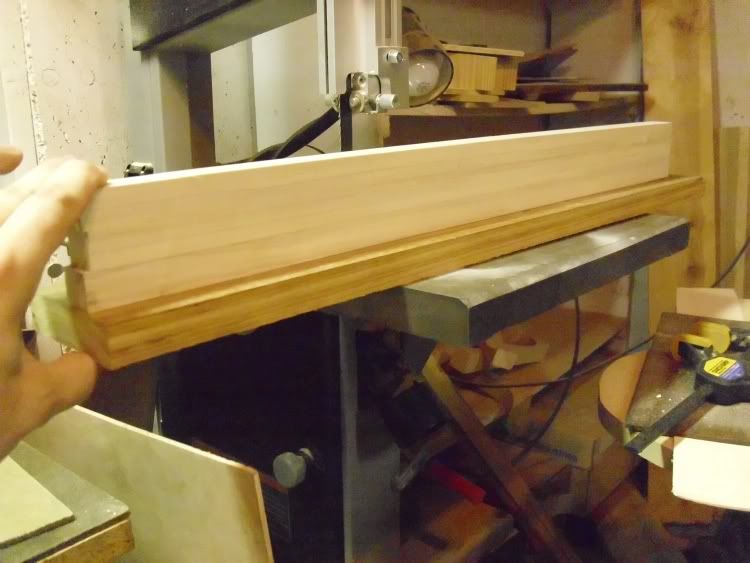 Pretty nice. Here's the end grain of the flat piece. 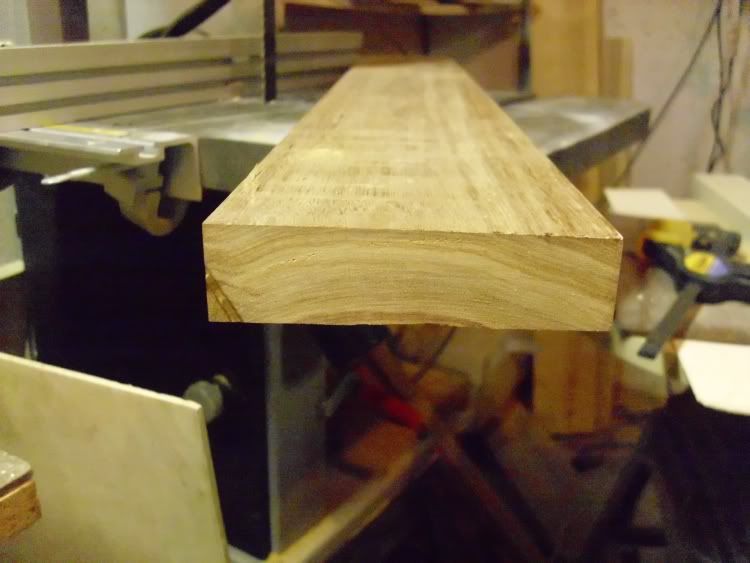 As near to flatsawn as canarywood gets. Here's where I'm going to get ahead of myself in order to display what I said earlier about being open to change. Normally, I don't carve the neck until the fretboard is on and the frets are in. I just think it's easier to do the fretwork that way. This time, I'm going to do the rough carve BEFORE the fretboard is even attached. See, this board was perfectly flat until I cut it. Then half of it cupped while the other half didn't. This tells me that there's a possibility of other unknown about tension hiding in the 'flat' piece. When I go to carve it, the potential tension will be exposed, thus causing the wood to bend, cup, twist, or any combination thereof. It's worth the extra work later to have the peace of mind that the neck will be stable after it's carved. If it doesn't move, great. I can proceed as planned. If it DOES move, then I have to use a different wood for the neck. I'll cross that bridge when I come to it. |
|
|
|
Post by avengers63 on May 13, 2010 14:47:43 GMT -6
The body blank is probably the easiest thing there is to do in the entire process. It's just basic wood joinery. I'm not going to explain how to join wood here because honestly, if you don't even have that level of woodworking knowledge, you have no business trying to make a guitar from scratch. Many people thickness the pieces which will comprise the blank before glue-up. I'm usually not able to get a 100% even join, so I get it really close to the final thickness, then plane it down once it's out of the clamps. Either way is fine - it's the end result that's important. I didn't take any pictures of the blank for this guitar as it was being made, so I'll be showing some of a Les Paul I made for my niece. Here are the two halfs which became the body blank. They have already been planed close to the final thickness and edge jointed. 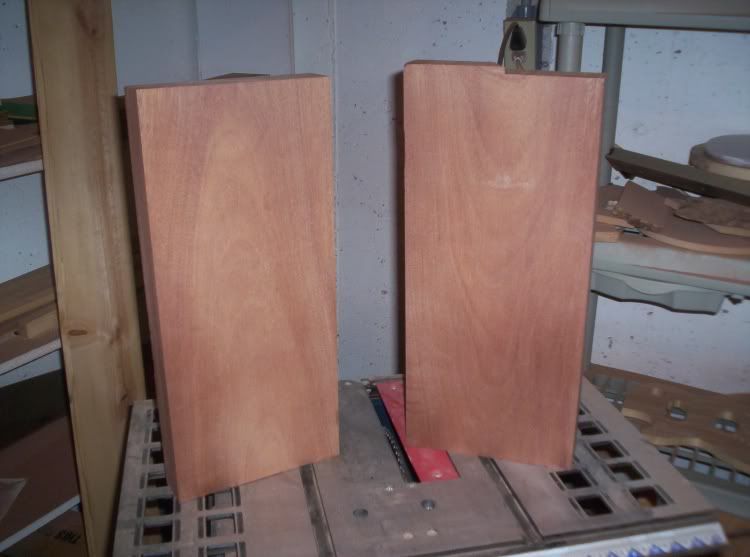 Glue them up and come back tomorrow to take them out of the clamps. 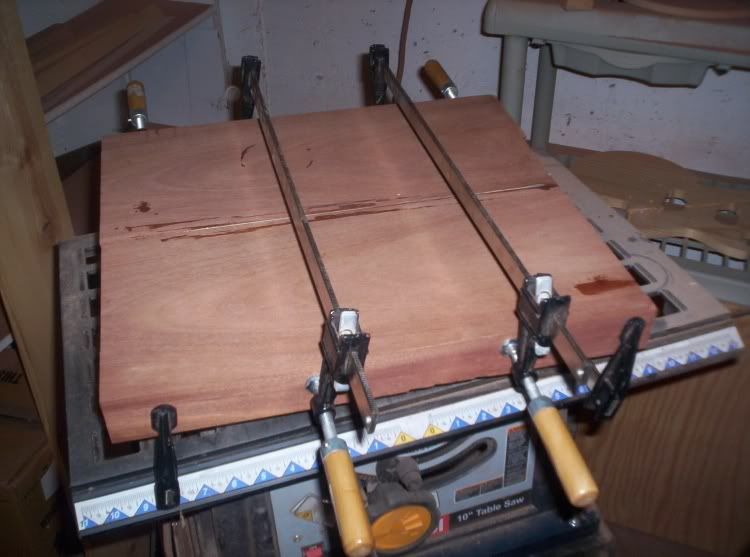 I like to use a 2-piece body blank for multiple reasons. In no order: it creates a built-in center line way cheaper than a 13"+ wide 8/4 piece of lumber way easier to find than a 13"+ wide 8/4 piece of lumber probably others I can't think of at the moment It's perfectly acceptable to have a 3 and 4 piece body blank. More than that and you'll start looking like you're just making it from scraps. You CAN thickness-glue 4/4 stock to get the thickness you're looking for. It's really no different than having a thick top of some exotic figured wood. Gibson has been doing this since the 1950's with the mahogany/maple Les Paul. Sometimes, it's just easier to find clear lumber in thinner stock. There are even structural stability advantages to thickness laminating the wood. The major drawback is the seam that will be around the edge of the body. If you're painting it, it won't matter. If it's a clear finish, this needs to be taken into consideration. Back to the body.... When it came out of the clamps, I planed it to thickness. You should already have your body template on hand. Place it on the blank wherever it's most pleasing to you taking the wood grain into account, then trace around the template with a black Sharpie. I used to use a pencil, but I had a hard time seeing the line in the next step. 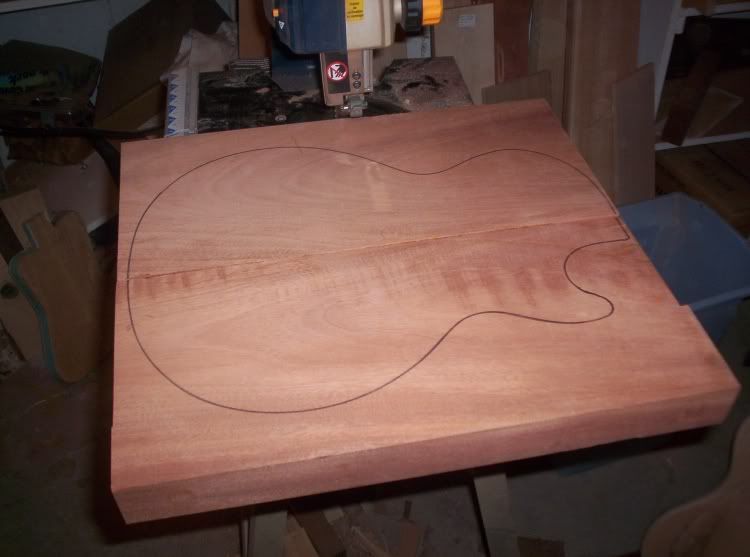 The next step being to rough cut it with the bandsaw or jigsaw. Theoretically, the black line isn't the exact same as the template, but a few hairs outside it's edge. With that in mind, you want to cut as close to the line as possible without going through it at all. 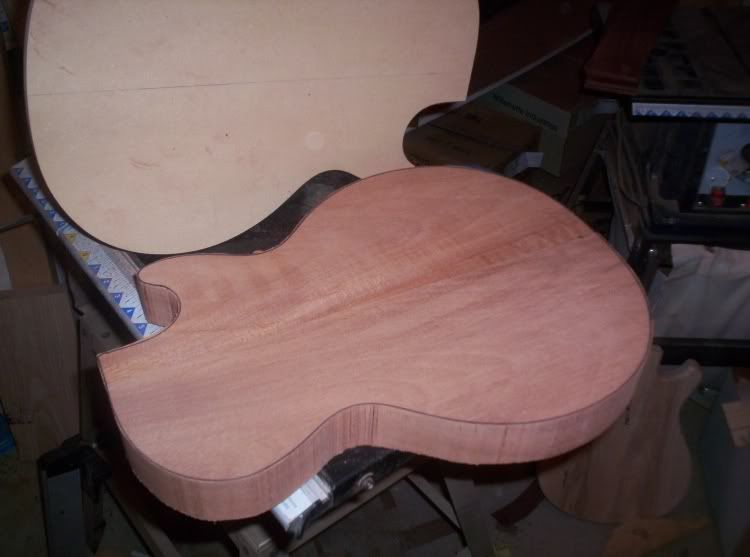 Making the cut as close as possible gives the router less work to do in the next step: routing to the template. Attach the template to the blank as securely as possible. Many people use double-sided carpet tape. I used this until I started screwing the template to the body. I just had to make sure that the screws were placed at the neck pocket and the bridge pickup positions. I switched to screws because I had a template move on me more than once. Many folks have never had an issue with the movement, and have had great luck with the tape. Whatever works best for you. You then rout to the template using any given template following bit. 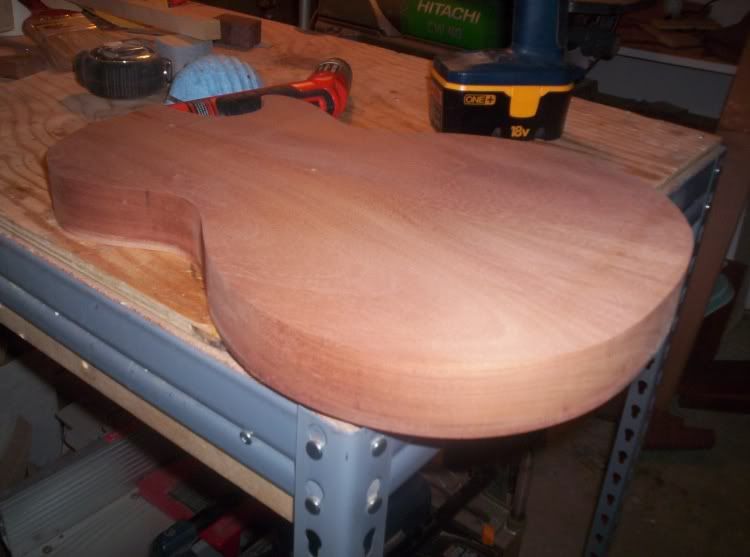 |
|
|
|
Post by donovan on May 13, 2010 20:41:45 GMT -6
A couple questions so far for you Avenger, what type of glue do you use or suggest on your body blanks? I have heard about Titebond stuff but I have also heard it doesn't make that much of a difference.
Also, do you mill or plane your wood pieces before gluing them? And then do you get the proper thickness after it has been glued?
I really wanted to thank you for taking on this thread as well. I really hope you can help me with homemade necks though!
|
|
|
|
Post by avengers63 on May 14, 2010 6:06:50 GMT -6
Titebond is the standard. There are some who swear by epoxy, but those are the minority. Epoxy certainly has it's place in the process, but I don't believe it's appropriate for large-area gluing such as this.
I've never used any brand of wood glue besides Titebond, so I can't testify for or against any of them. I know that Titebond is specifically made to be wood glue, and there's not an appreciable price difference between brands, so i've never had the need or want to try anything else.
There are different varieties of Titebond - I, II, and III. Titebond II is the devil. It's waterproof and blocks any finish from penetrating into the wood, thus leaving blotches of glue marks. Stick with Titebond I.
You HAVE to do a certain amount of milling before edge gluing. You have to make a square edge on the jointer. Before that can happen, you have to have at least one flat face to ride on the jointer's fence. There's no sense in planing just one side flat, so I do the other side at the same time.
Because my glue-up technique isn't want it should be, I usually only get the pieces to about 1/8" over the final thickness. My joints are almost always off by just a hair, or the edges weren't PERFECTLY square so the blank isn't totally flat. Planing it down after the blank is glued, or even after the body is rough cut but before it's routed to the template, takes care of this.
Sometimes I have a body that's too wide for the planer. These usually require a 3-piece blank, or to have small bits glued onto the edges/tips. (Think Explorer or Firebird.) In these cases, I'll glue a section that can still go through my planer, then plane it and the other pieces to final thickness. Before gluing on the rest of the blank, I'll clamp on a piece of flat material (a long board, plywood, MDF... whatever works) and use it to keep everything flat & even.
Another item I've started using is a biscuit joiner. This has helped me keep the large pieces more level so less planing is needed to clean it up. You just have to plan ahead for where the biscuits will go. You don't want to accidentally expose them through routing.
|
|
|
|
Post by donovan on May 14, 2010 9:55:04 GMT -6
Ok thanks John! This is helpful to me. I've got the body blank that I want to do so I will clean it up and then go ahead and purchase some Titebond I for the gluing stage and then it might honestly just stay like that for the summer until I get back from my trip in August and have time to put into it.
|
|
|
|
Post by avengers63 on May 14, 2010 10:46:43 GMT -6
When discussing the neck blank, I forgot to mention dimensions. Generally speaking, the blank needs to be a minimum of 30" long, 3" wide, and 7/8" thick. For a neck-through, it needs to be at least the same thickness of the body and (obviously) long enough to run the full length of the body. For a one-piece, it needs to be thick enough to accomodate the headstock angle, usually 2"-2 1/2". For the neck, there are a few different options: 1) set, bolt-on, neck-through 2) tiltback headstock or drop down 3) one-piece or glued If you're ready to make your guitar from scratch, you should already be familiar with the first two options. For the third, what I mean by "one piece" and "glued" is the thickness and potential headstock angle. You really only need a one-piece neck if you're going to have a tiltback headstock, huge acoustic-like heel, or both. For this one, I've chosen to have a set neck with a scarfed - or glued - tiltback headstock. The main reason I went with the tiltback is because of the 3+3 tuners. They just don't look right on a drop-down headstock. So that brings us to a discussion about scarf joints. Basically, you cut through the board at an angle, then glue the pieces together so that a hard corner is formed. The angle of the corner is usually 10-13 degrees. I usually go with 13. No reason I can validate - it's just what I do. I've seen various jigs that supposedly give you a precise cut. In the end, they all still need to be cleaned up with either a jointer or hand plane, so I personally think they're a waste of time. My technique: mark the angle on the board 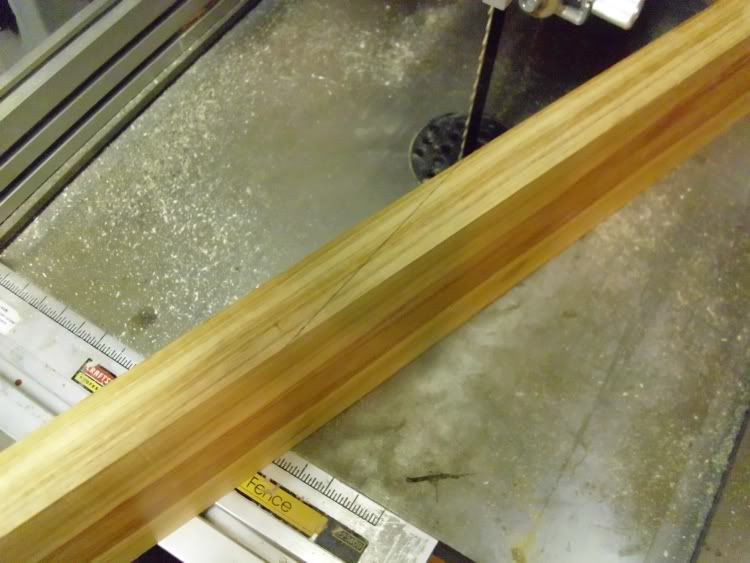 then cut it freehand on the bandsaw 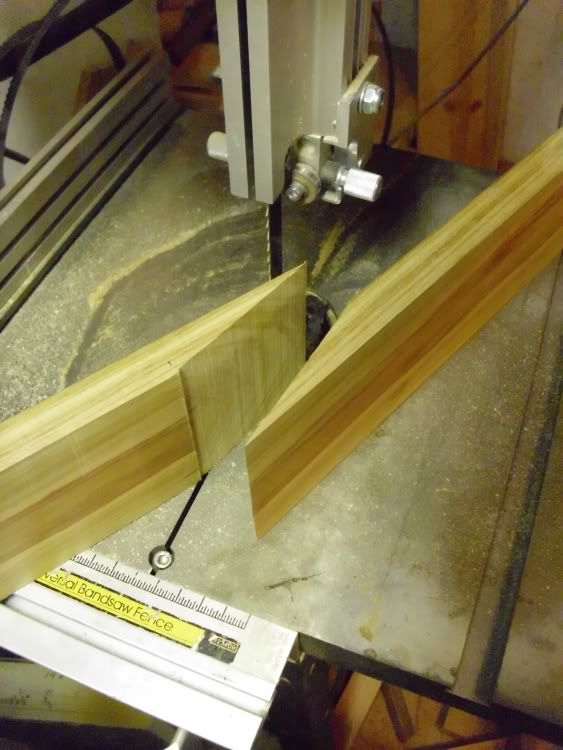 That leaves you with a pretty rough cut.... 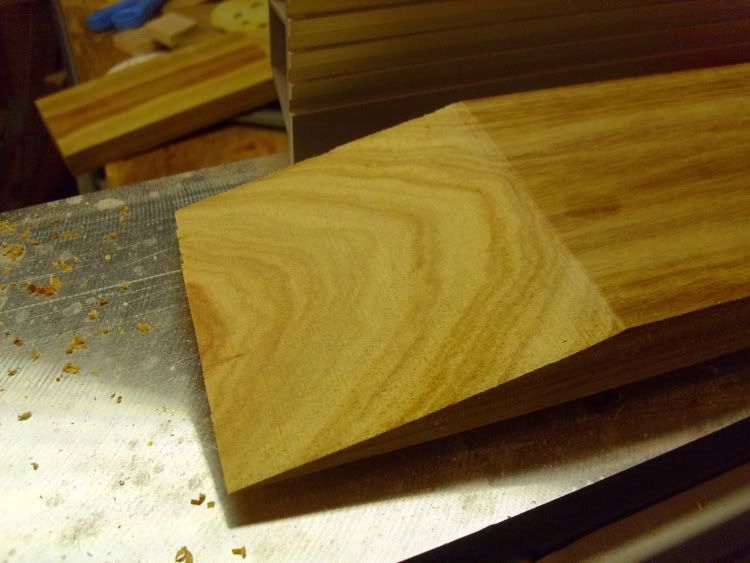 which I clean up with the jointer 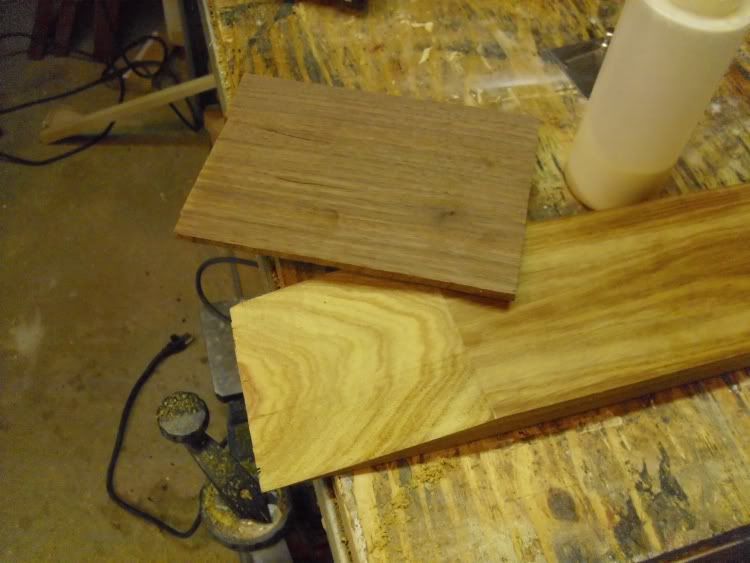 When you're plotting out where to make the cut, you HAVE to leave enough there to be able to form the headstock. I don't have an exact formula for how to calculate the end result. I draw a line, take some measurements, then repeat until I have it right. For a tiltback, you want at least 7" past the corner. I advise practicing on some construction-grade pine before dorking up your blank. I think they're currently about $4 for an 8FT long 1x3 at Lowes. Seriously - ruin that one a few times first. |
|
|
|
Post by avengers63 on May 14, 2010 11:13:47 GMT -6
So after the board is cut, you have two different ways to glue it together: in front... 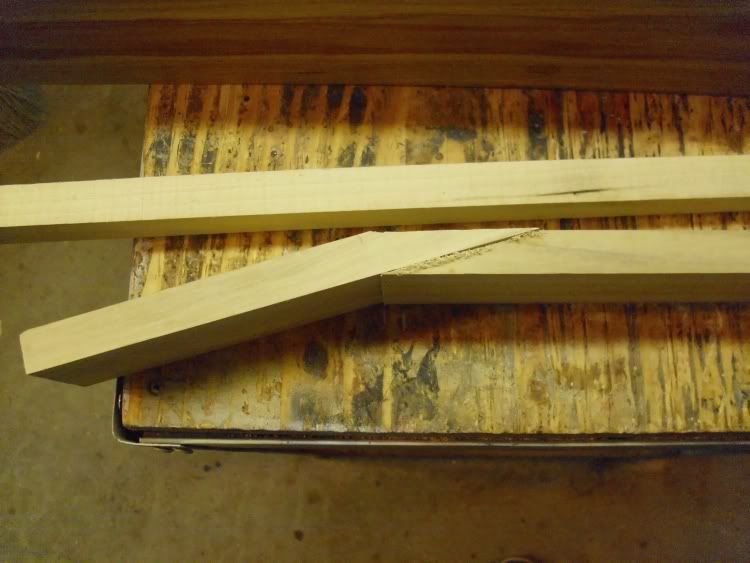 ...or on the bottom 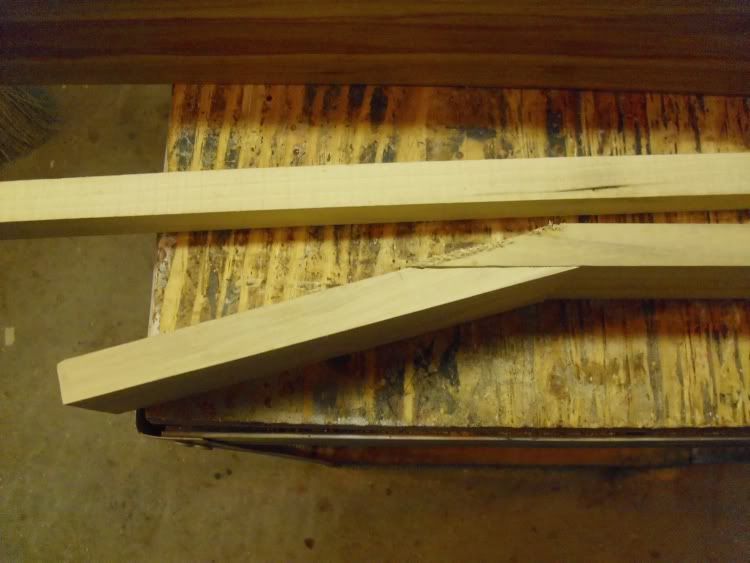 Gluing it in front adds length to the neck, so you have less room for error on the headstock length. This also puts the glue line underneath the fretboard, adding that glue joint's strength to the scarf. The drawback to that one is that the scarf is plainly visible. For a wood with a pronounced grain like canarywood, this makes it stand out. Aesthetically, that might not be desirable for you. Gluing it underneath adds length to the headstock, but takes length from the face, so there is less room for error there. On the good side, it's easier to plan for that possibility by simply having the blank be a few inches longer. This also largely hides the glue joint. from the back. The drawback is there is a large joint in the face of the headstock. This is often hidden under a faceplate. The faceplate also adds it's strength to the scarf. It's debatable as to which joint is stronger. They've both had documented failure and documented longevity. I feel that in the end it all comes down to which one you're more comfortable with. I use the first one simply because I feel that it's stronger. So.... now that we've decided no where to glue the scarf, what is to be done about the joint itself? As I mentioned, a pronounced grain can make a scarf look odd. Maybe you'd think it's great, but I don't and I'm the one making it, so there.  In the Arts & Crafts style of woodworking, they not only made no effort to hide the joinery, they highlighted it and made it into a feature. That is what will be done here. A 3/16" laminate of walnut will be inserted into the scarf. This will not only add decoration, it will create a visual stopping point allowing the grain to change directions without being jarring to the eye. It will also tie the body to the neck visually. To make the point again about keeping the plans fluid, the walnut stripe in the scarf wasn't part of the original plan. When I saw how abrupt the scarf looked from the side, I wanted to do something to break it up. That's when the pinstripe idea hit me. It kept the theme, served a positive purpose, and works very well within the composition, so the change is a very positive one. SIDEBAR: When I was fiddling around with the blank, trying to decide how best to cut it, I had some aesthetic choices to make. Canarywood is generally yellow, but can have some orange, brown, and red streaks in it that are quite striking. This blank has a great red-orange streak running down one side. It's not very thick though. It would have been a shame to cover it up with the fretboard, but it's so shallow that the whole thing would have been carved away when the neck is shaped. In the end, I chose to have the streak go right through the middle of the headstock. If I'm lucky, the remaining stripe on the back might peek out towards the heel. If not, I'll have to be happy preserving it on the headstock. |
|
|
|
Post by avengers63 on May 14, 2010 11:22:37 GMT -6
Back on track... gluing on the pinstripe 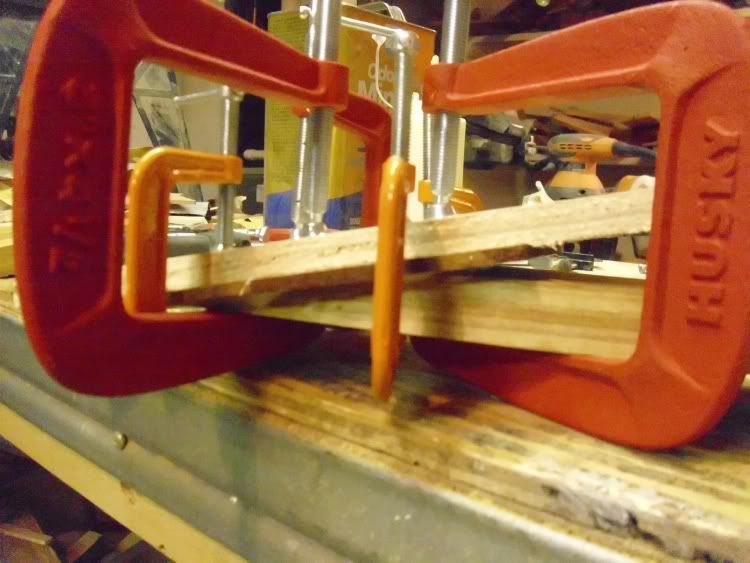 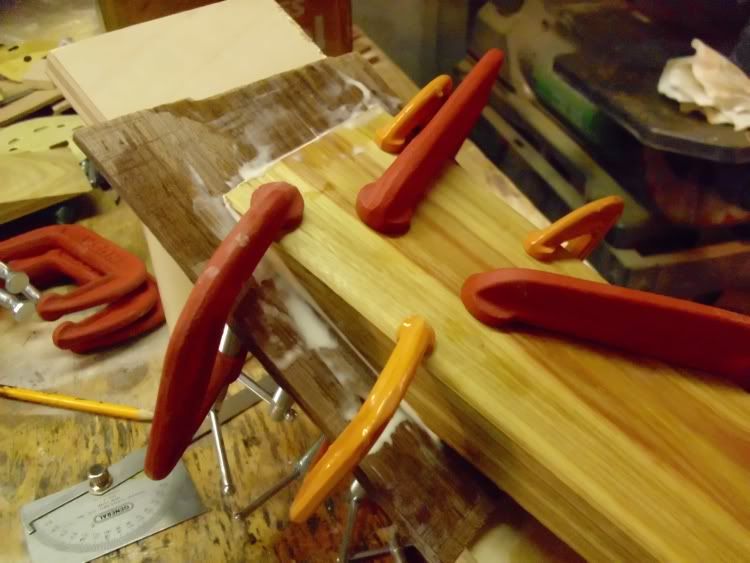 cleaning it up with the bandsaw and jointer 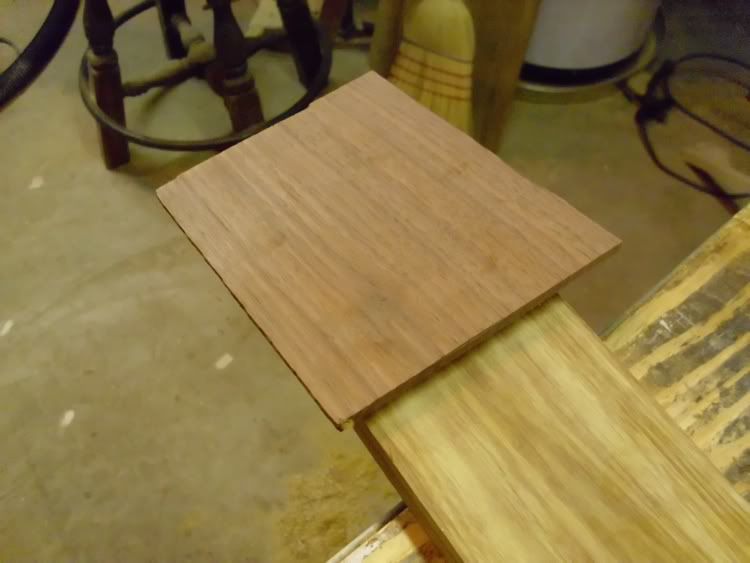 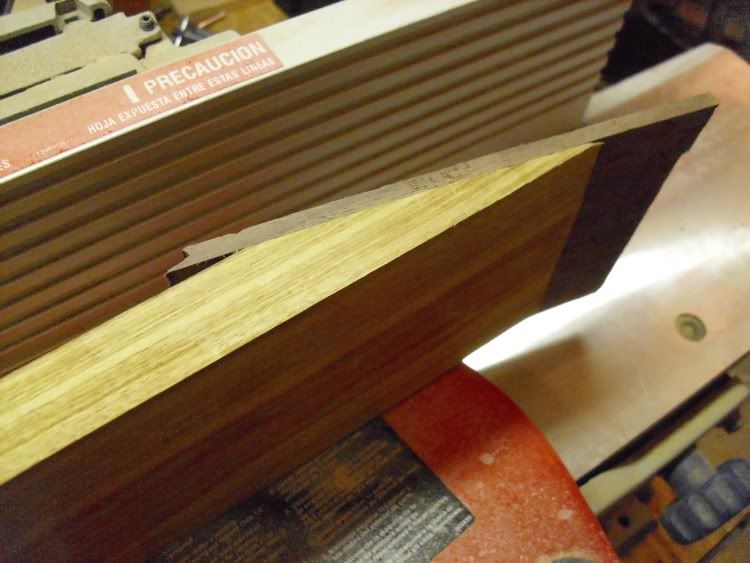 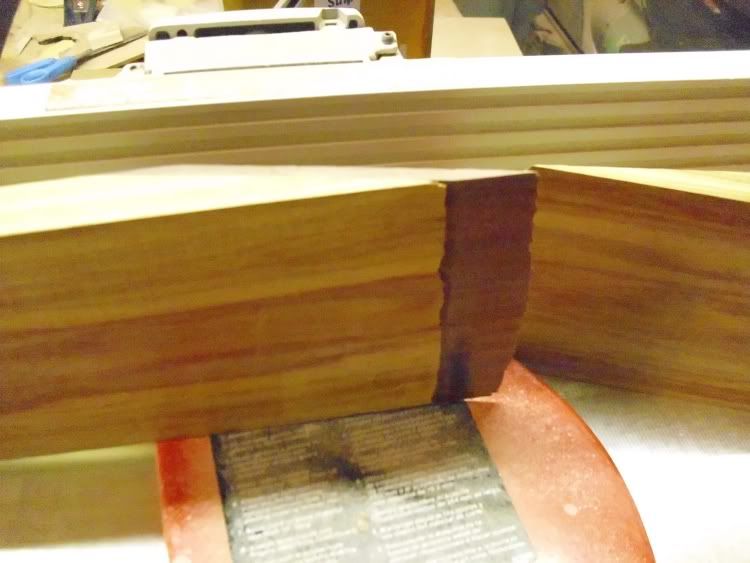 gluing the headstock on 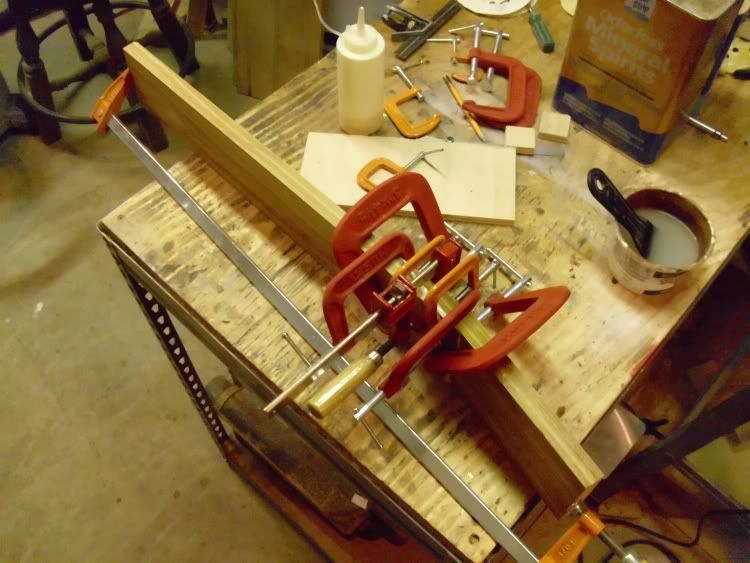 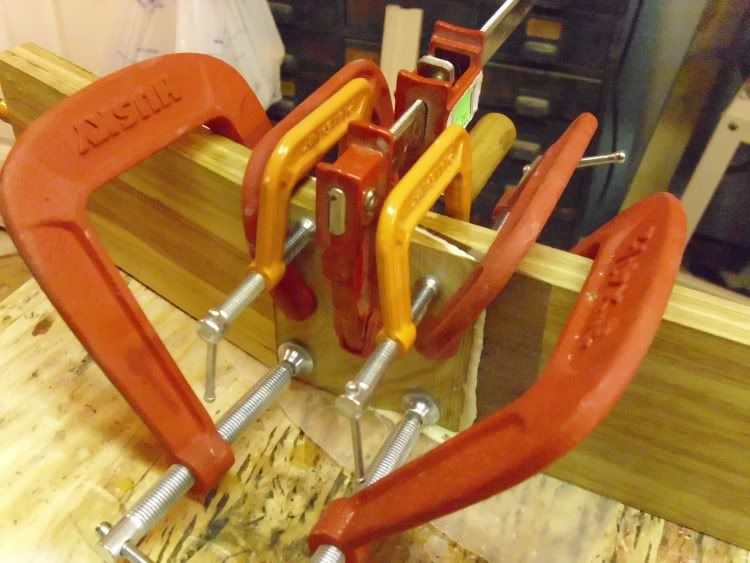 Two things to point out here. First, don't underestimate a basic C-clamp. They have an unreal amount of clamping pressure. Just be sure to use a caul of some sort or you'll leave dents in the wood. The caul will also help distribute the clamping pressure evenly in the joint. Second, look at the first picture of the headstock being glued on. You're gluing an angle, and glue is dang slippery. If you don't do something to hold it in place, you'll never get a good glue joint. I use a long clamp to keep the headstock from sliding right off the end. I've also screwed it down (yes, really!) and used brad nails (never again!). I've seen folks clamp it to the table is all kinds of odd ways. It's the end result that's important, not the method used. |
|
|
|
Post by avengers63 on May 17, 2010 12:24:46 GMT -6
OK - the neck sat in the clamps all weekend. Time to take it out and see what we have. 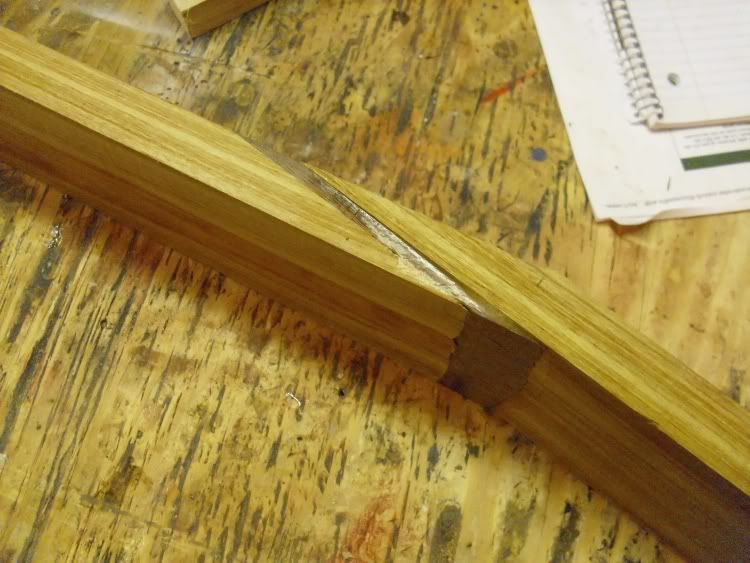 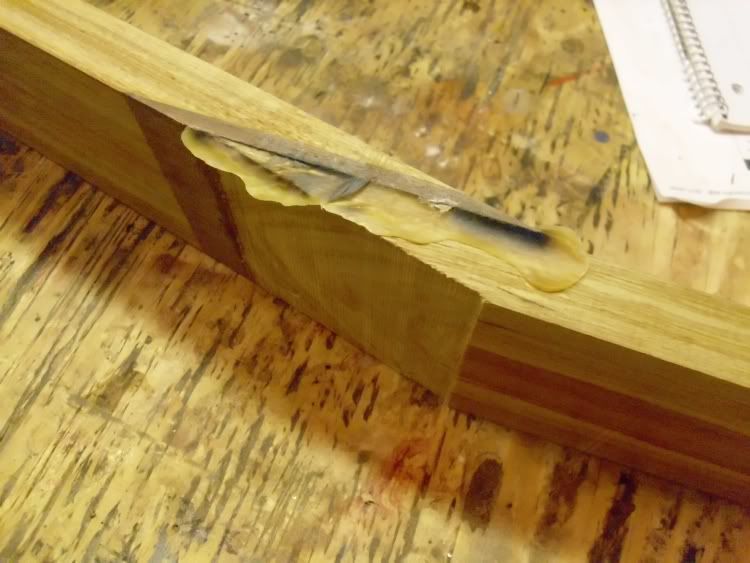 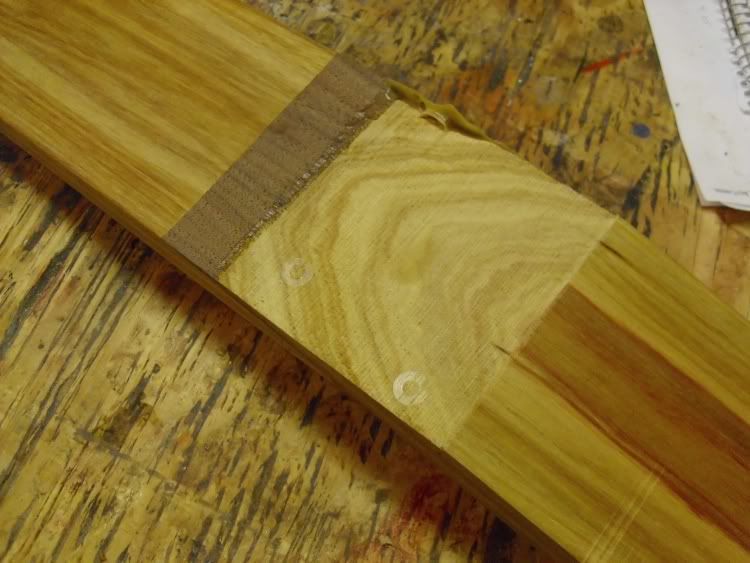 WOW!!! This really looks like crap. Honestly, this is the worst scarf joint I've ever done. The whole thing is lopsided. It wouldn't be such a big deal were it not for the walnut pinstripe. There's no way I'm starting over, but.... dang. It slid in the clamps. You can see it best in pic #3. You can see it even more clearly in person - the headstock is crooked by more than 1/8" at the end. It's kind of a good thing that this happened. It illustrates the point that NO build is perfect... period. Things crop up and they must be dealt with and/or worked around. It's just part of the process. I can almost guarantee that this will not be the only mishap in the process. The first & second pictures look worse than they are. It's all squeeze-out from the gluing process. It DOES show the misalignment though. So the question is "How do we clean this mess up?" We turn to our friend: the jointer. You could also do it with hand tools, specifically a leveling plane. I like my power tools, so that's what I go for every time. Suit yourself with your tool of choice. First, I'll even out the face. When that's taken care of, I can do the edges. It's EXACTLY like you're prepping a board for cutting. This one just has an angle in it. And here she is. 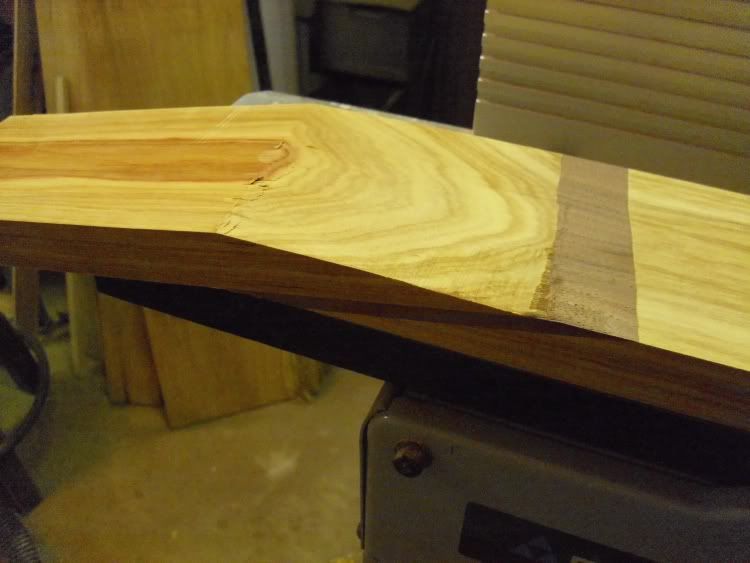 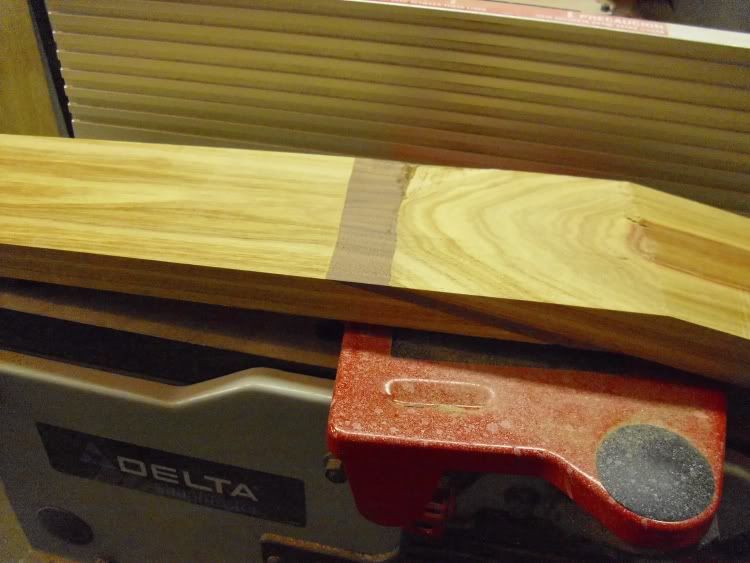 Through the neck blank preparation process, the whole thing has been taken down to 3/4" thick. That's the absolute bare minimum you want. This is why it's a GOOD thing to start with a blank that's a little thicker than what we used. |
|
|
|
Post by avengers63 on May 17, 2010 12:56:31 GMT -6
I looked through my pictures, and I don't have any of the fretboard being made.  So here's the general process: Make a blank in the neighborhood of 3" wide by 20-22" long. It can be anywhere from 1/4-5/16" thick. Mark & cut the fret slots. This can be done by hand or with a jig & template. Many people can accurately measure the fret placement and do it by hand without any problem at all. I'm not one of those people. I use Stewart-Macdonald's products: fret slotting miter box www.stewmac.com/shop/Fretting_supplies/Saws_and_slots/Fret_Slotting_Miter_Box.htmlfret slotting templates www.stewmac.com/shopby/product/4915It's dang easy to use and pretty self-explanatory once it's in your hands. For the fret saw, anything with a kerf of 0.02"-0.022" will work. You can buy the fretting saws from luthier supply houses or look elsewhere, but the kerf width is the important part. When cutting the slots, you don't need to cut any deeper than the tang of the frets you'll be using. The trick is to cut deep enough to compensate for the radius you'll be sanding into the board. Which segue ways nicely into the next step: sanding the radius. Basically the only way to do this is with a radiusing block. www.stewmac.com/shop/Fretting_supplies/Leveling/Fretboard_Radius-sanding_Blocks.htmlYou simply stick low-grit sandpaper (60 grit is a good place to start) to the block and go to town on the board. You have to be careful that you keep the sanding even along the length and sides. It's REALLY easy to make low spots. Check your progress regularly with a good straight-edge to smooth out any low spots. When sanding the radius, I scribble pencil marks over the face of the board. When the pencil is gone, that area is done. I'll do this a few times, just to be sure I have it right. Once it's radiused, you can progress through the grits to about 220 - 320. It's not time to polish the board yet, so that's all the higher you need to go. At some point, you'll want to put in some fret markers or other decorative inlays. This should really be done before it's radiused. I didn't put the inlays in the OOP because there's no one place where you HAVE to do it. It's one of those things that's "whatever works for you". Here's MY normal procedure for the entire neck build: make the blank rout for the truss rod slot the fretboard cut the fretboard to length glue fretboard onto neck blank cut the neck taper (covered later) rout binding channel for fretboard (if it's to be bound) inlay fret markers (before radiusing so I have a flat surface to work with) glue on the binding (if it's used) radius the fretboard install frets shape the back of the neck Some of these steps were moved because of the pieces used. The canarywood night move again, so the neck shaping was moved. The fretboard I'm using was already made, inlaid, and slotted, so that changes things somewhat as well. In any event, you'll need to work out your own method. |
|
|
|
Post by avengers63 on May 18, 2010 9:08:57 GMT -6
Routing the truss rod channel is pretty easy. It's a simple matter of placement, marking it out, then routing a straight line. So to make it look more difficult than it is.... You first have to have a center-line marked on your neck. This is why you have to joint at least one edge: so that you have a consistent point of reference. I like to use a combo square to do this, but that's just me. Make sure it runs down the face of the headstock as well. After the center line is established, you need to place your fretboard. Here, you're just looking where the nut and the last fret will be. These help determine where the truss rod will be placed. The other factor that determines the truss rod placement is which end of the neck the business end will be at. Will it be in the neck, like most tiltback headstocks, or at the heel? For this one, it's being done at the nut. Here it is with the f/b laid next to the center line for reference and the rod where I want it. 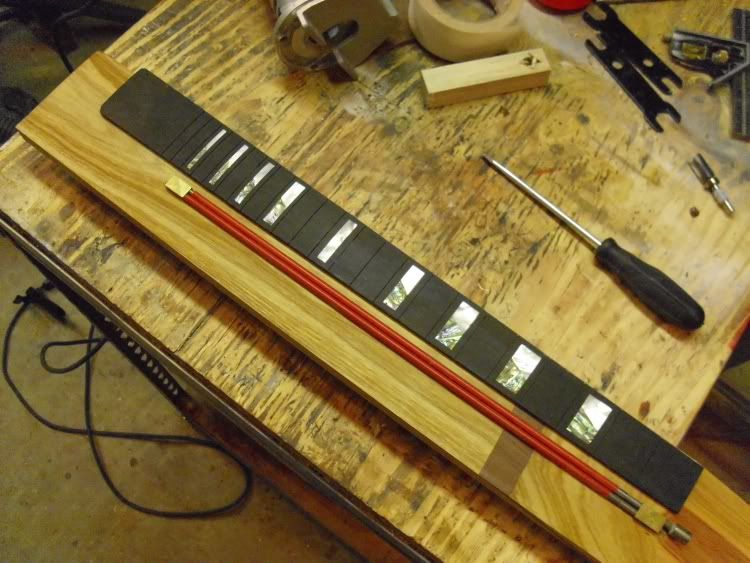 Mark on the center line where the end of the rod is. 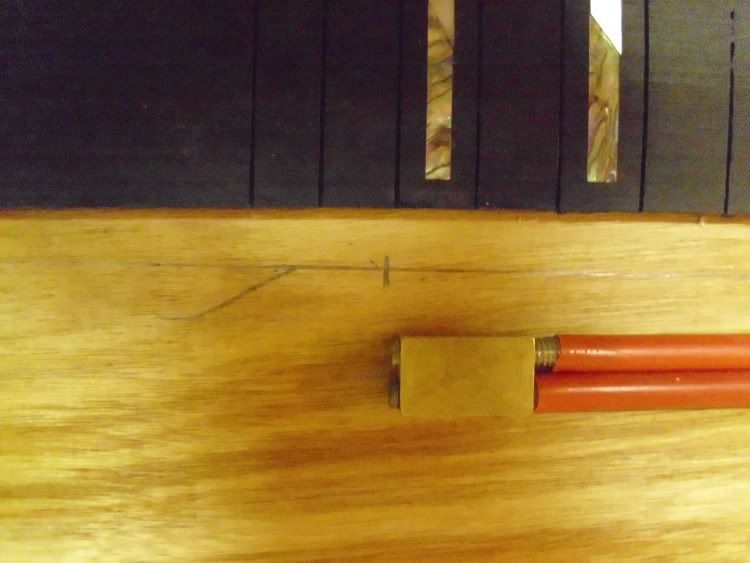 I don't think that placing the rod is an exact science. The important pieces are the ends and the adjustment access. The ends of the rod - the pressure points that are at the end of the bow - need to be completely under the wood and WELL supported. The adjustment screw/nut needs to be accessible from wherever it's placed. From there, it's just visual fine-tuning where you want it. A word on the truss rod itself here. There are two types: single action and double action. Singles are in my opinion more difficult to install and only bend in one direction. That makes them (to me) undesirable. A double action bends both directions and is much easier to install, so that's what I'll be showing you here. The channel needs to be no more than 1/32" deeper than the rod itself, and the exact width. You want the rod in there pretty snug, but with only a hair to move before it hits wood and starts bowing it. You don't really need to be overly concerned about it rattling around in the neck. If for some reason it does, simply tighten it just a bit so that it's pressing against it's channel but not bowing the wood. Most rods are the same width as a standard straight bit, so getting the width exact is virtually a given. The rod I'm using is from Stew-Mac and is 1/4" wide. For the router itself, you need one that has an edge-following attachment. 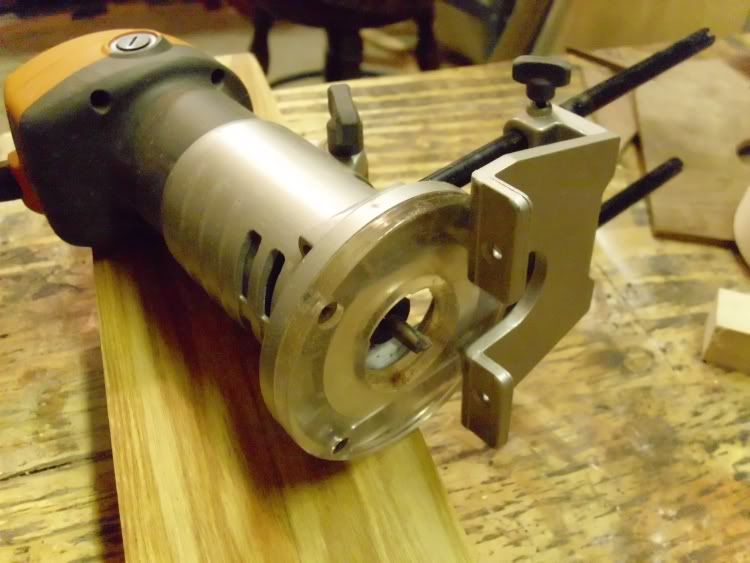 Alternatively, you can do it with a router table. The drawback is that you can't see exactly what you're doing, so you'll either have to set up some stop blocks or use some elaborate marking system. In the long run, I found using an edge-following attachment much better. You'll notice that I'm using a laminate trim router instead of a full-sized model. This is underpowered for the job, therefore requiring more passes to reach the final depth. With the narrow face, I found this size a LOT easier to control than the larger one. Some folks have no problem with the larger ones on the narrow neck. The big thing is safety first. If you're not comfortable using a power tool, DON'T USE IT. When you do the end of the rod, you either have to eyeball it or set up a stop block. It's pretty easy to overshoot. Then you have to fill in the hole. More work that isn't necessary if just an ounce of caution is used. And here's the channel all done and with the rod sitting in place. 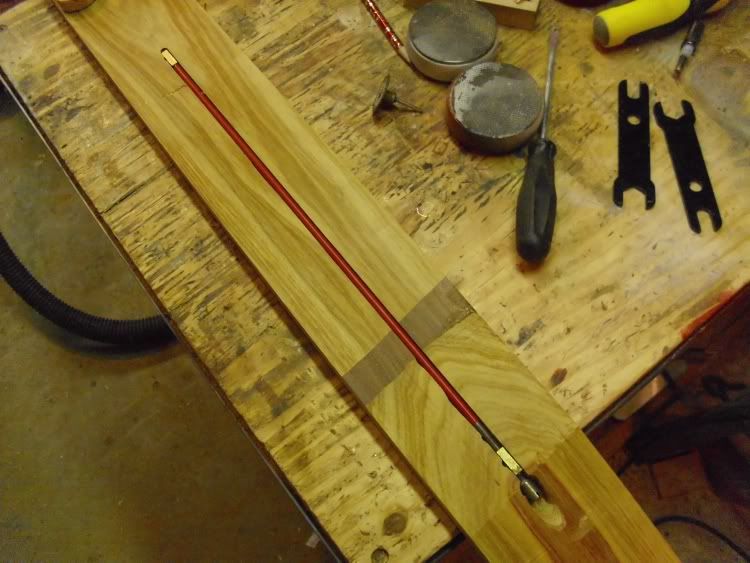 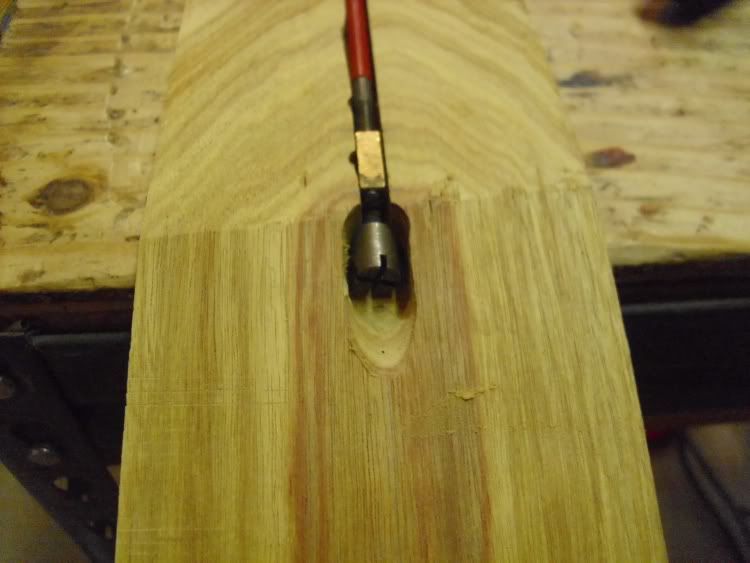 I didn't take any pictures of dong the access end on purpose. There are a lot of different styles of adjustments, and there's no way I could cover them all. This one is actually meant to be at the heel, but I'm using it at the neck anyway. |
|