|
|
Post by cknowles on Dec 30, 2007 14:10:05 GMT -6
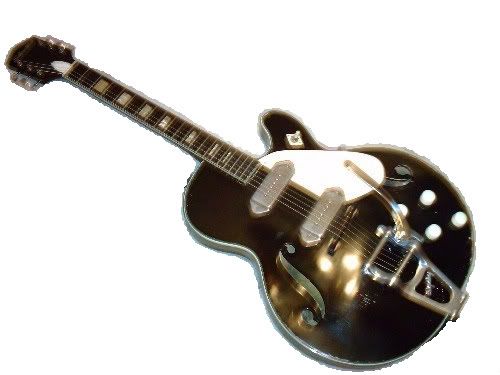
Once home I strung it up and plugged in for some great twangin' but all I got was the sounds of silence. Hmm, switch pickups from neck to bridge and I got some sounds. Back to the combined position and again silence. I hadn't got this far to give up so I went back to my work bench and started removing screws. I got my trusty multimeter out and discovered the resistance across the neck pickup was zero. So I removed the pickup and tested the resistance again and it was 5.7k. Hmm that's interesting. I turned it over and discovered a sharp piece of solder poking from the ground lug into the hot lead. So I bent it a bit farther away then re-melted the solder to get rid of the sharp point. So I put it all back together and re-tested the resistance across the neck pickup as each screw was put back in. Long story short, my new guitar was ready for playing at our Christmas Eve service with about 15 minutes to spare! It performed flawlessly all night and sounded fantastic.  |
|
|
|
Post by cknowles on Dec 30, 2007 14:12:14 GMT -6
Next upgrades will include my signature wooden scratch guard and an inlay of the KokoTele character. Meanwhile my tele is now certified! I hope you've enjoyed reading as much as I enjoyed building my first parts caster. P.S. a more complete record of my build is available on my website: www.ckcustomguitars.ca/index.html |
|
|
|
Post by GuitarAttack Forum on Dec 31, 2007 6:49:29 GMT -6
Chris -- Great job. I know it will inspire folks to try it for themselves.
Let us know if you have any long term lessons learned...those things you wish you had done differently, if there are any!
Happy New Year,
John
|
|
|
|
Post by shattered on Jan 2, 2008 12:30:09 GMT -6
I'm interested in hearing more about how you applied the poly with a rag. Was it easier to polish than a nitro clearcoat? Any wipemarks or anything? How long did it take to cure?
|
|
|
|
Post by GuitarAttack Forum on Jan 3, 2008 8:07:18 GMT -6
Looks great, Chris. The finish is really nice.
Let us know how you like the wiring setup.
John
|
|
|
|
Post by cknowles on Jan 3, 2008 12:19:13 GMT -6
Doing a hand rubbed finish isn't that tricky, and for me it reduced the appearance of brush strokes.
I simply used an old t-shirt from the rag bin (making sure it was clean first) and dipped it into a water based polyurethane which I wiped on making sure to get even coverage over the whole guitar body.
Between every second coat I used 0000 steel wool to smooth the surface, followed by vacuum, then magnets in a tack cloth to remove the metal shavings. I found I could apply up to 4 coats per day with the finish dry to the touch within about 15 minutes or so. I would apply 2 coats within 30 minutes, then let it sit for several hours then steel wool then add 2 more coats.
After 16 coats it had built enough for a final steel wool, then rubbing compound followed by carnuba wax. The finish polished out beautifully by hand, I don't have even a poor quality polisher. Besides by hand it may take a bit longer, but your risk of burning through the finish is much less.
What I liked best about this process was the complete lack of odor as the finish dried (as did the rest of my family as I was doing this in the basement rather than the workshop due to the cold).
My experience with water based poly is that it takes on a slightly milky hue for several weeks until it's completely cured and becomes fully transparent.
|
|
|
|
Post by cknowles on Jan 3, 2008 12:27:11 GMT -6
John the wiring setup is fantastic. The treble bleed wiring mod is really clean and sounds quite natural as you roll the volume. Especially nice when doing volume swells, it just sounds "right". Having the volume control close to the pick guard gives a very intuitive feel. I can grab the volume without hunting for it, it just falls to hand. I've posted some samples here: www.ckcustomguitars.ca/un-SAGA-Tele/samples/index.htmll |
|
|
|
Post by GuitarAttack Forum on Jan 5, 2008 4:16:02 GMT -6
Chris -- Glad the wiring is working for you. Once I played my T-Style with the controls reversed, I wondered why all Teles weren't set up that way!
Thanks again,
John
|
|
|
|
Post by kcjewel on Jan 23, 2008 0:26:22 GMT -6
Chris, any reason why you chose the water based poly over the oil based? It really looks nice.  John |
|
|
|
Post by cknowles on Jan 24, 2008 10:53:33 GMT -6
I've had great success with water based poly in most of my other woodworking projects. So my reasoning here would be simply that I'm comfortable working with it. That and it doesn't have a strong odor which is important when I'm finishing the guitar in my basement.
|
|
|
|
Post by hoz on Jan 24, 2008 12:22:44 GMT -6
I spray water-based laquar in a converted walk-in closet. I have a good exhuast fan. I wouldn't be able to do that with regular laquer without killing myself or exploding. Everything else is done outside.
|
|
|
|
Post by cknowles on Feb 4, 2008 20:40:53 GMT -6
Update: I went to Exotic Woods in Burlington Ontario and picked up some Ziricote for a pick Guard.  With the flash turned on you can see the grain of the Ziricote, however to the eye it appears almost completely black.  |
|
|
|
Post by GuitarAttack Forum on Feb 5, 2008 6:04:48 GMT -6
That is awesome, Chris. Did you cut the profile of the pickguard yourself? Very well done.
Very nice guitar -- any more lessons learned from the build?
John
|
|
|
|
Post by firsttimer on Feb 5, 2008 6:58:07 GMT -6
I saw the article - Using a piece of bison bone for a nut? that's interesting. very innovative.
|
|
|
|
Post by cknowles on Feb 5, 2008 7:05:31 GMT -6
Yes I did cut the pickguard myself. I had to use the white guard as a template for the pickup route and for the mounting screw holes and basic shape. However I cut the guard oversized so that I could make it match the contours of the body better. I have a scroll saw which I used to create the basic shape, then used a dremel with a sanding wheel to refine the shape until I was happy with it. The Ziricote is not an even toned wood, there are wild color variations across the grain. I really wanted a more uniform color so I tried some stain that I had from the body build. Mistake, it made the Ziricote turn brown instead of the black I was hoping for. I bought some ebony stain and put that over the brown and got a really rich Dark Chocolate color that I'm really pleased with. 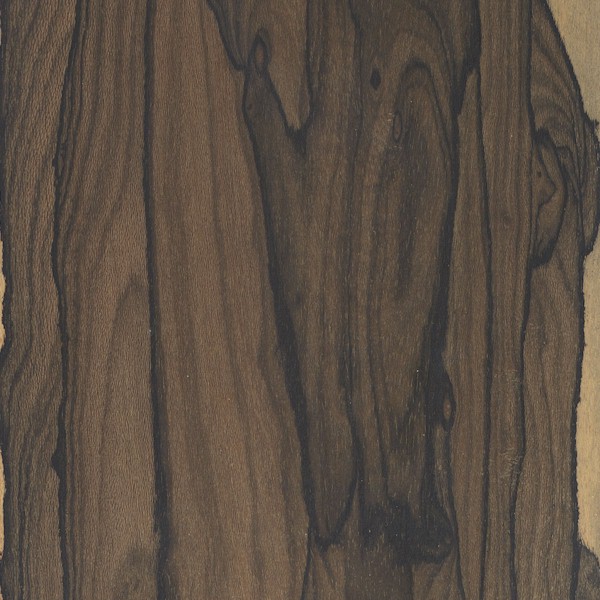 It seems every time I try using stain on a guitar body I end up with something completely different from what my original intent was! LOL In the end though it usually turns out better than my original plan. The lesson I've learned is to keep moving forward and let the true character of the guitar assert itself as the build progresses. To recap, Issues I ran into were poorly placed bridge pickup route forcing me to align the neck further down than I would have liked. The tuning peg holes were not uniformly spaced and were drilled for modern tuners, I had bought vintage style so adjustments were required. Bridge and neck alignment meant that a stock standard tele pick guard required some adjustment before everything looked right. These complexities I believe made the build more interesting and I'm quite happy with the result. The guitar plays really nicely and has beautiful tone. |
|