Deleted
Deleted Member
Posts: 0
|
Post by Deleted on Oct 1, 2010 9:46:48 GMT -6
Hey there! Well here is a new project for me. It's a walnut T-Stile Body with a walnut and maple neck. The neck blank I made up before I left FL So it is nice and stable. I'm thinking of a set neck on this one. As you can see in the pictures I hogged out the two halves for cambering. I learned to hog out the wood before you router it out. It save the router bits and keeps the router from being over worked as well. The two halves are one piece and should have them glued up by tonight. Sometime this weekend I'll have the body finished routed. At the moment what you are looking at is the body in ruff cut just off the band saw.      |
|
|
|
Post by avengers63 on Oct 1, 2010 10:17:42 GMT -6
I love walnut. It's wonderful to work with, looks fantastic regardless of the finish type, and sounds GREAT for a guitar. And that's some nice looking crotch/burl figuring you have there!
|
|
Deleted
Deleted Member
Posts: 0
|
Post by Deleted on Oct 2, 2010 6:46:32 GMT -6
yes I like walnut as well. This is my second build using walnut. The wood I am using was given to me. It was cut about 40 to 50 years ago. I don't know the age of the tree. But it's not as heavy as the walnut I used on my neck through guitar.
I didn't get to work on it yesterday so I'm hopping to get some work done on it this weekend.
I am trying to figure out if I want to go with the reg Tele stile pickups or go with the humbucker in the bridge and Tele pickup at the neck. But I have time to decide.
EB
|
|
Deleted
Deleted Member
Posts: 0
|
Post by Deleted on Oct 3, 2010 19:34:45 GMT -6
Well, got some stuff done on this build today. Here is shot of the cambering. The dark spots is were I used some CA20 to fill in some spots.  Here she is being glued up.  And here is the body after the gluing, routing and some sanding.  Now for the neck! Here is a picture of the neck blank getting ready to be cut. I made the jig back when I was in FL. I made it to be used on my table saw I had back there. So I now have a new tables saw and my jig would not work on it, so I adapted it work on my band saw. It worked like charm.  Yet another shot of the neck blank and jig.  And last but not least is picture of the scarf joint being glued together.  |
|
Deleted
Deleted Member
Posts: 0
|
Post by Deleted on Oct 5, 2010 21:21:46 GMT -6
Well, did you ever have one of those days where nothing goes right. I had one today. The neck blank I was going to use (one in the picture) I guess I must have measured wrong and wound up cutting it too short. So I wont be able to use it for this build. So now I don't know what the heck I'm going to do for a neck for this. But I guess I'll come up with something.  EB     |
|
|
|
Post by niels on Oct 6, 2010 2:33:05 GMT -6
Ah that sucks.
This looks really good though!
|
|
|
|
Post by avengers63 on Oct 6, 2010 5:56:55 GMT -6
So now I don't know what the heck I'm going to do for a neck for this. But I guess I'll come up with something. I'm guessing you'll sit and stew over it for a bit, then make another one. A few months ago something similar happened to me. I made a 5-ply blank, 2" thick. I split it down the middle, then planed the twp pieces to 3/4" so I could have 2 necks from the one blank. After scarfing them BOTH, I went to even out the face on the jointer. I do this all the time, so what's the issue, right? I had just changed the blades on the thing, and they weren't perfectly level. After a few passes, BOTH necks were completely screwed. I didn't see it until I was on the 2nd one. So I let the whole thing sit for a few days while I got over it and figured out what I wanted to do. The blank I made after that was better than what I started with. You'll be fine. Just walk away from it for a while. When you come back, you'll be able to see it with fresh eyes, a clear head, and a new perspective. |
|
Deleted
Deleted Member
Posts: 0
|
Post by Deleted on Oct 6, 2010 18:42:30 GMT -6
Hey thanks for the encouragement avenger!
I knew it was going to happen some day, I just wish it didn't happen on that blank. OH well, but your right I'll back off it for a day or two.
I did glue up a blank with some ceder and wall nut. I used the walnut in the middle and ceder on the outside. I'm going to use some carbon fiber rods in this neck to help make a little stronger. HE! HE!
EB
|
|
Deleted
Deleted Member
Posts: 0
|
Post by Deleted on Oct 27, 2010 18:16:36 GMT -6
Hey! I was able to save the neck I started making for this body.
I'll show some pictures latter on.
Here is what I did to save it.
I took it off the shelf and got to looking at it and remembered someone else that did a miss measurement and how he was able to fix it.
Good thing I have a joiner/ planer. What you do is first measure to make sure you have enough wood to wok with (I did) so then the next thing is, is to run it through through the planer. The side where the fret board would or will go. What this does is, it stretches the neck to give you a longer plat form for the fret board.
No it doesn't stretch the wood, but as I recall that is what the guy called that I got the idea from.
Like I side pictures later on...
EB
|
|
Deleted
Deleted Member
Posts: 0
|
Post by Deleted on Oct 27, 2010 18:52:10 GMT -6
Oh yeah... I for got to say that this is going to be a 22 fret neck.
EB
|
|
Deleted
Deleted Member
Posts: 0
|
Post by Deleted on Oct 28, 2010 17:31:18 GMT -6
Got the neck ruffed in. I won't finish the neck until it is mounted to the guitar.
I'LL post some pictures later on tonight.
EB
|
|
Deleted
Deleted Member
Posts: 0
|
Post by Deleted on Oct 30, 2010 18:04:02 GMT -6
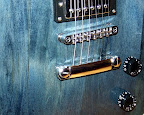
Here are some more pictures! This is shot of the fret board being glued on. Two way truss rod is in.  Here is a shot of the front and back of the body after the round over.   Front view of the neck. I made my own veneer for the head stock from left over wood from the body. I wanted the head stock to match the body.  This is the back of the neck. One picture shows that the heal is not yet cut. Thant won't get cut till I mount it into the body.   I am going to try my hand at making some inlays for the fret board. The inlays will be made out the same wood the body is. I am so so glad I was able to figure out how to save this neck. So far the build is going smooth! Thanks for looking! EB |
|
|
|
Post by dmac1379 on Oct 30, 2010 20:19:12 GMT -6
I lke the grain pattern in that walnut. That is going to look so nice when it's finished.  |
|
|
|
Post by avengers63 on Oct 30, 2010 20:22:37 GMT -6
[quote author=eagleblues board=general thread=1116 I am going to try my hand at making some inlays for the fret board. The inlays will be made out the same wood the body is.[/quote] Scroll saw? That's what I used to make these... 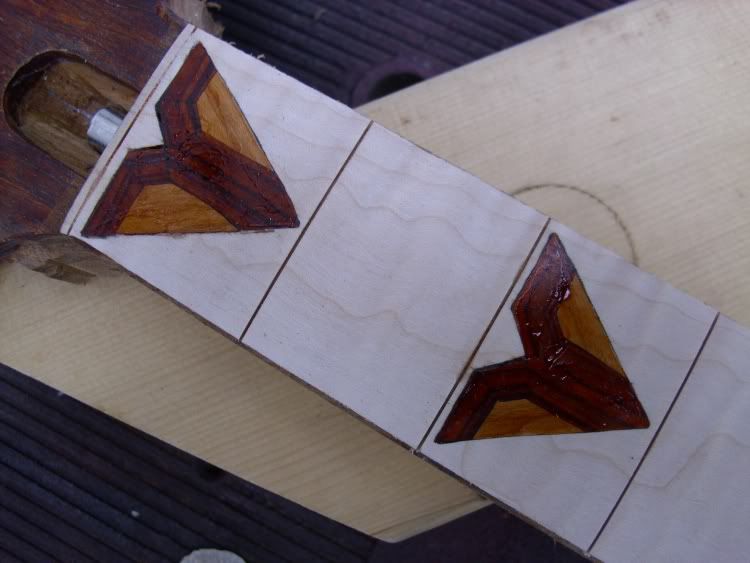 |
|
|
|
Post by niels on Oct 31, 2010 0:39:09 GMT -6
Body look really nice Eddie. what kind of inlays are you going to make?
|
|